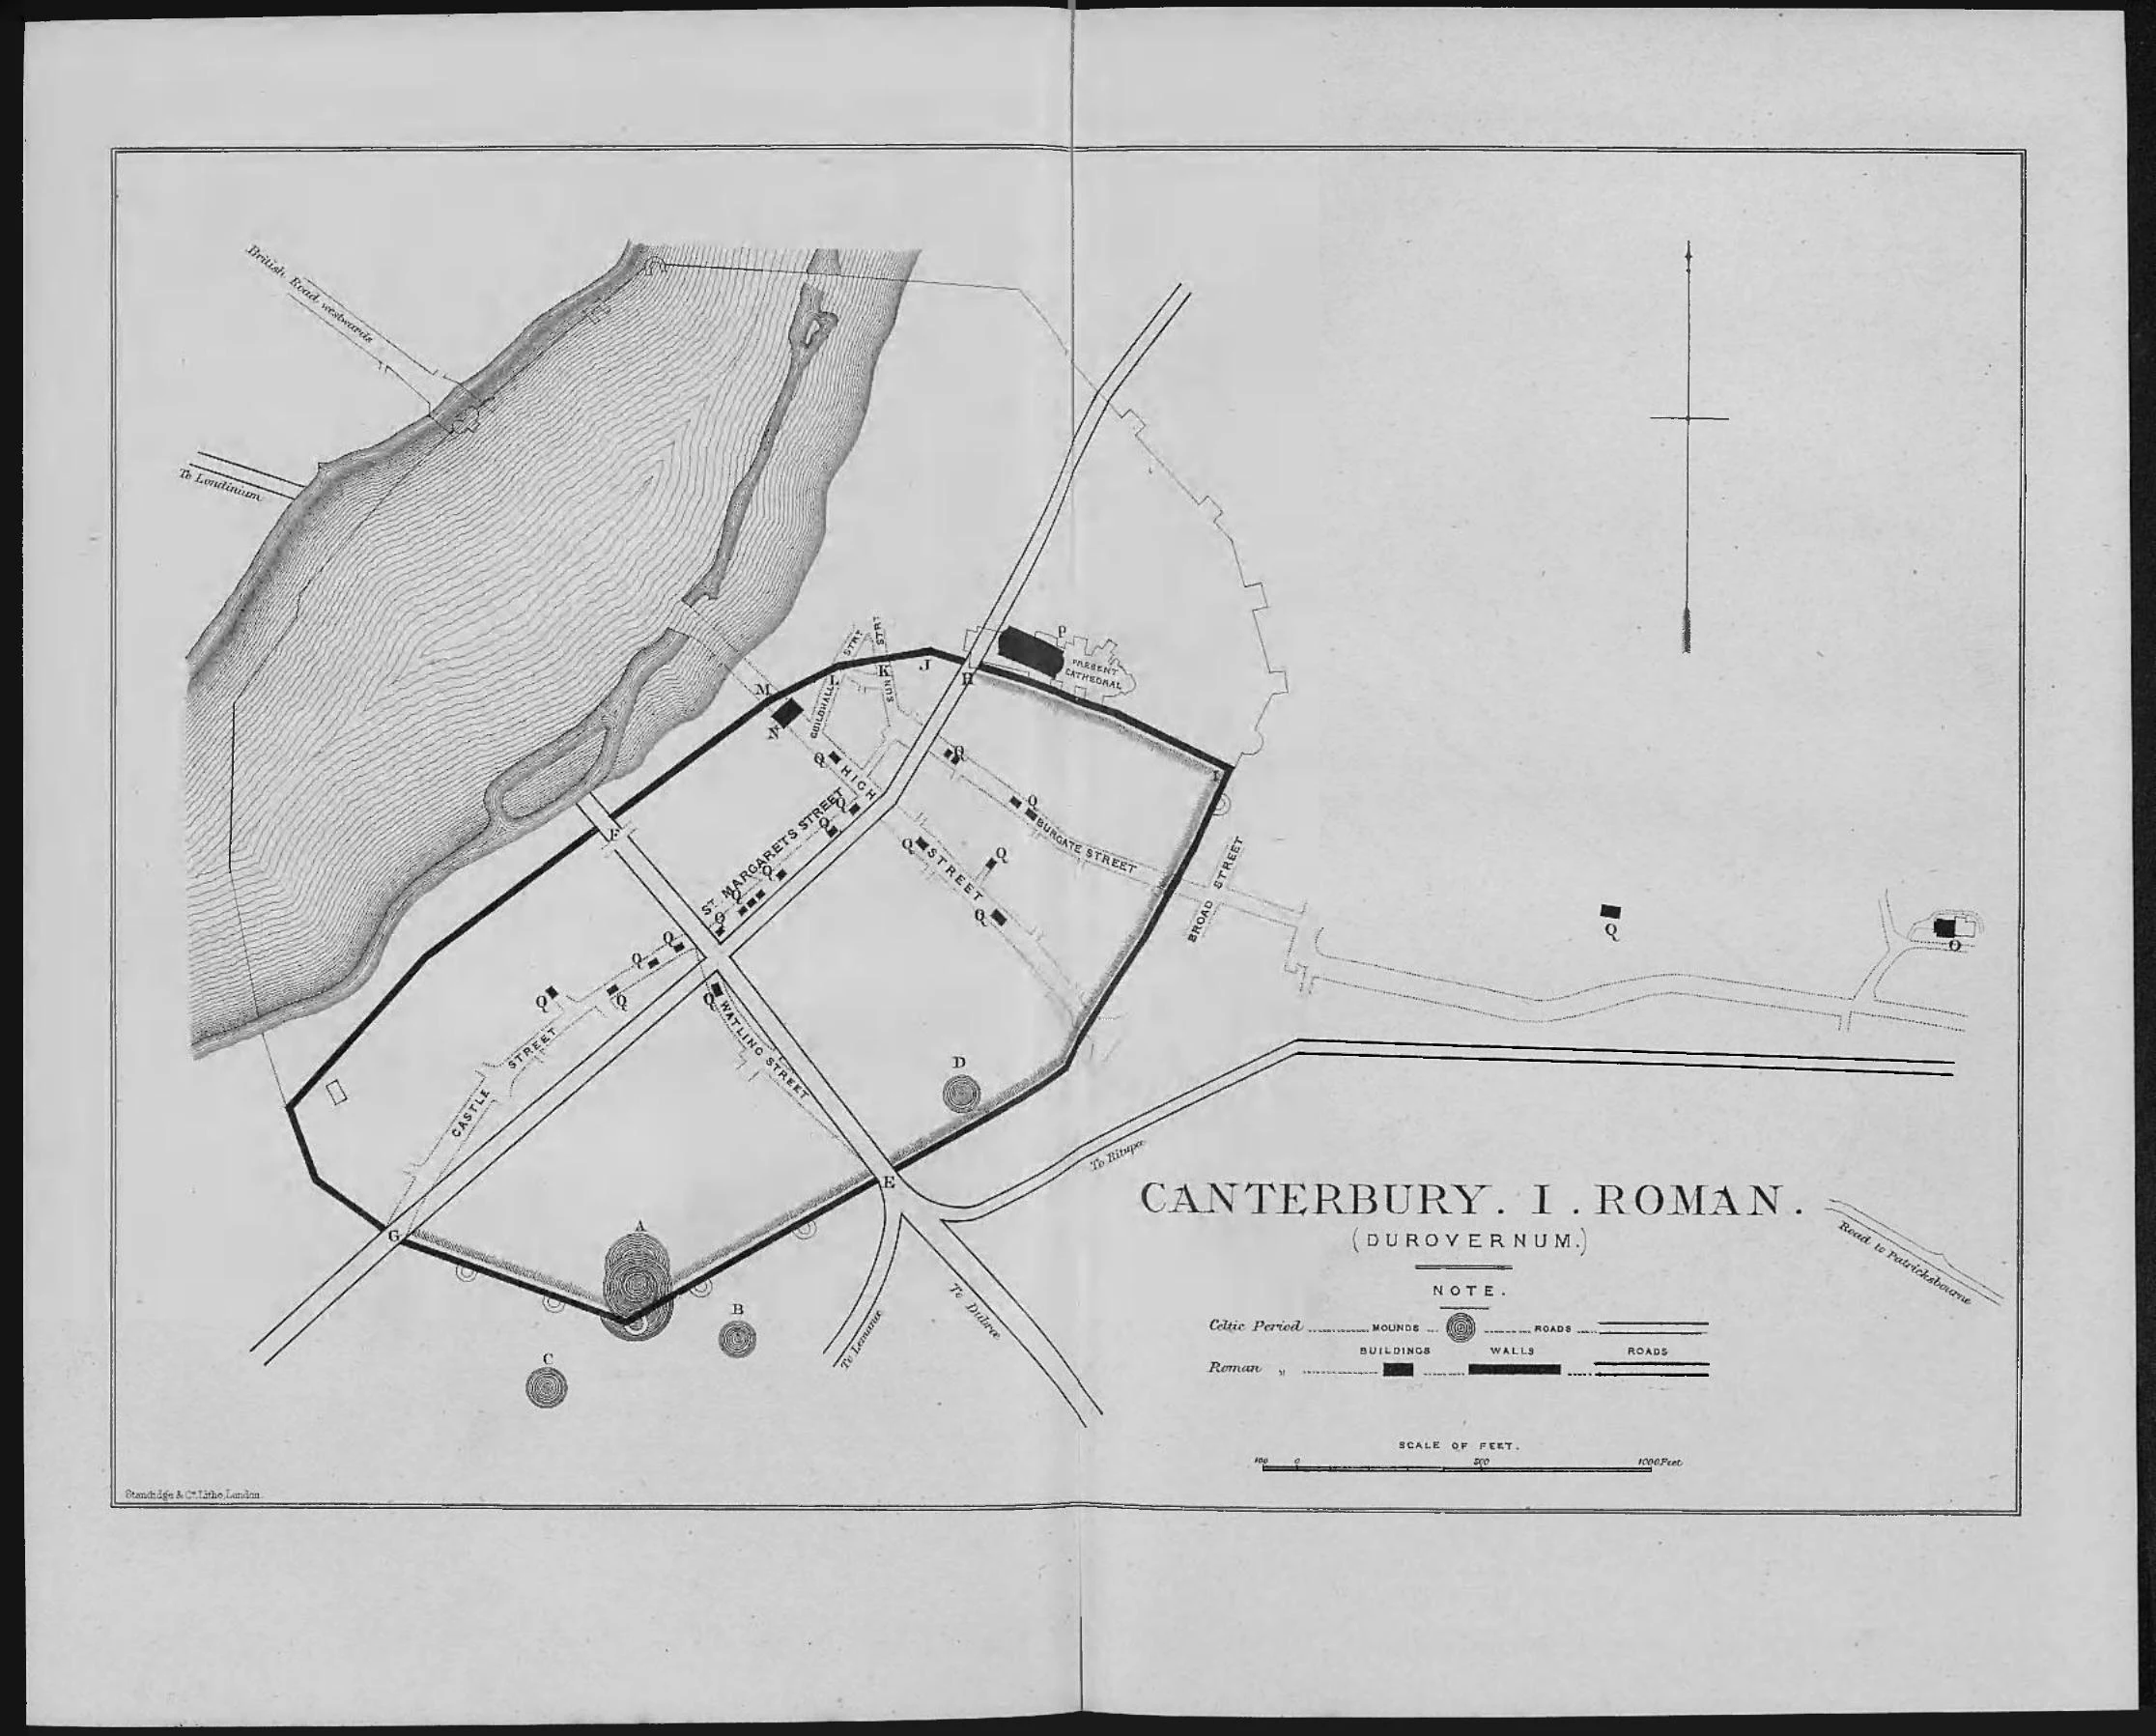
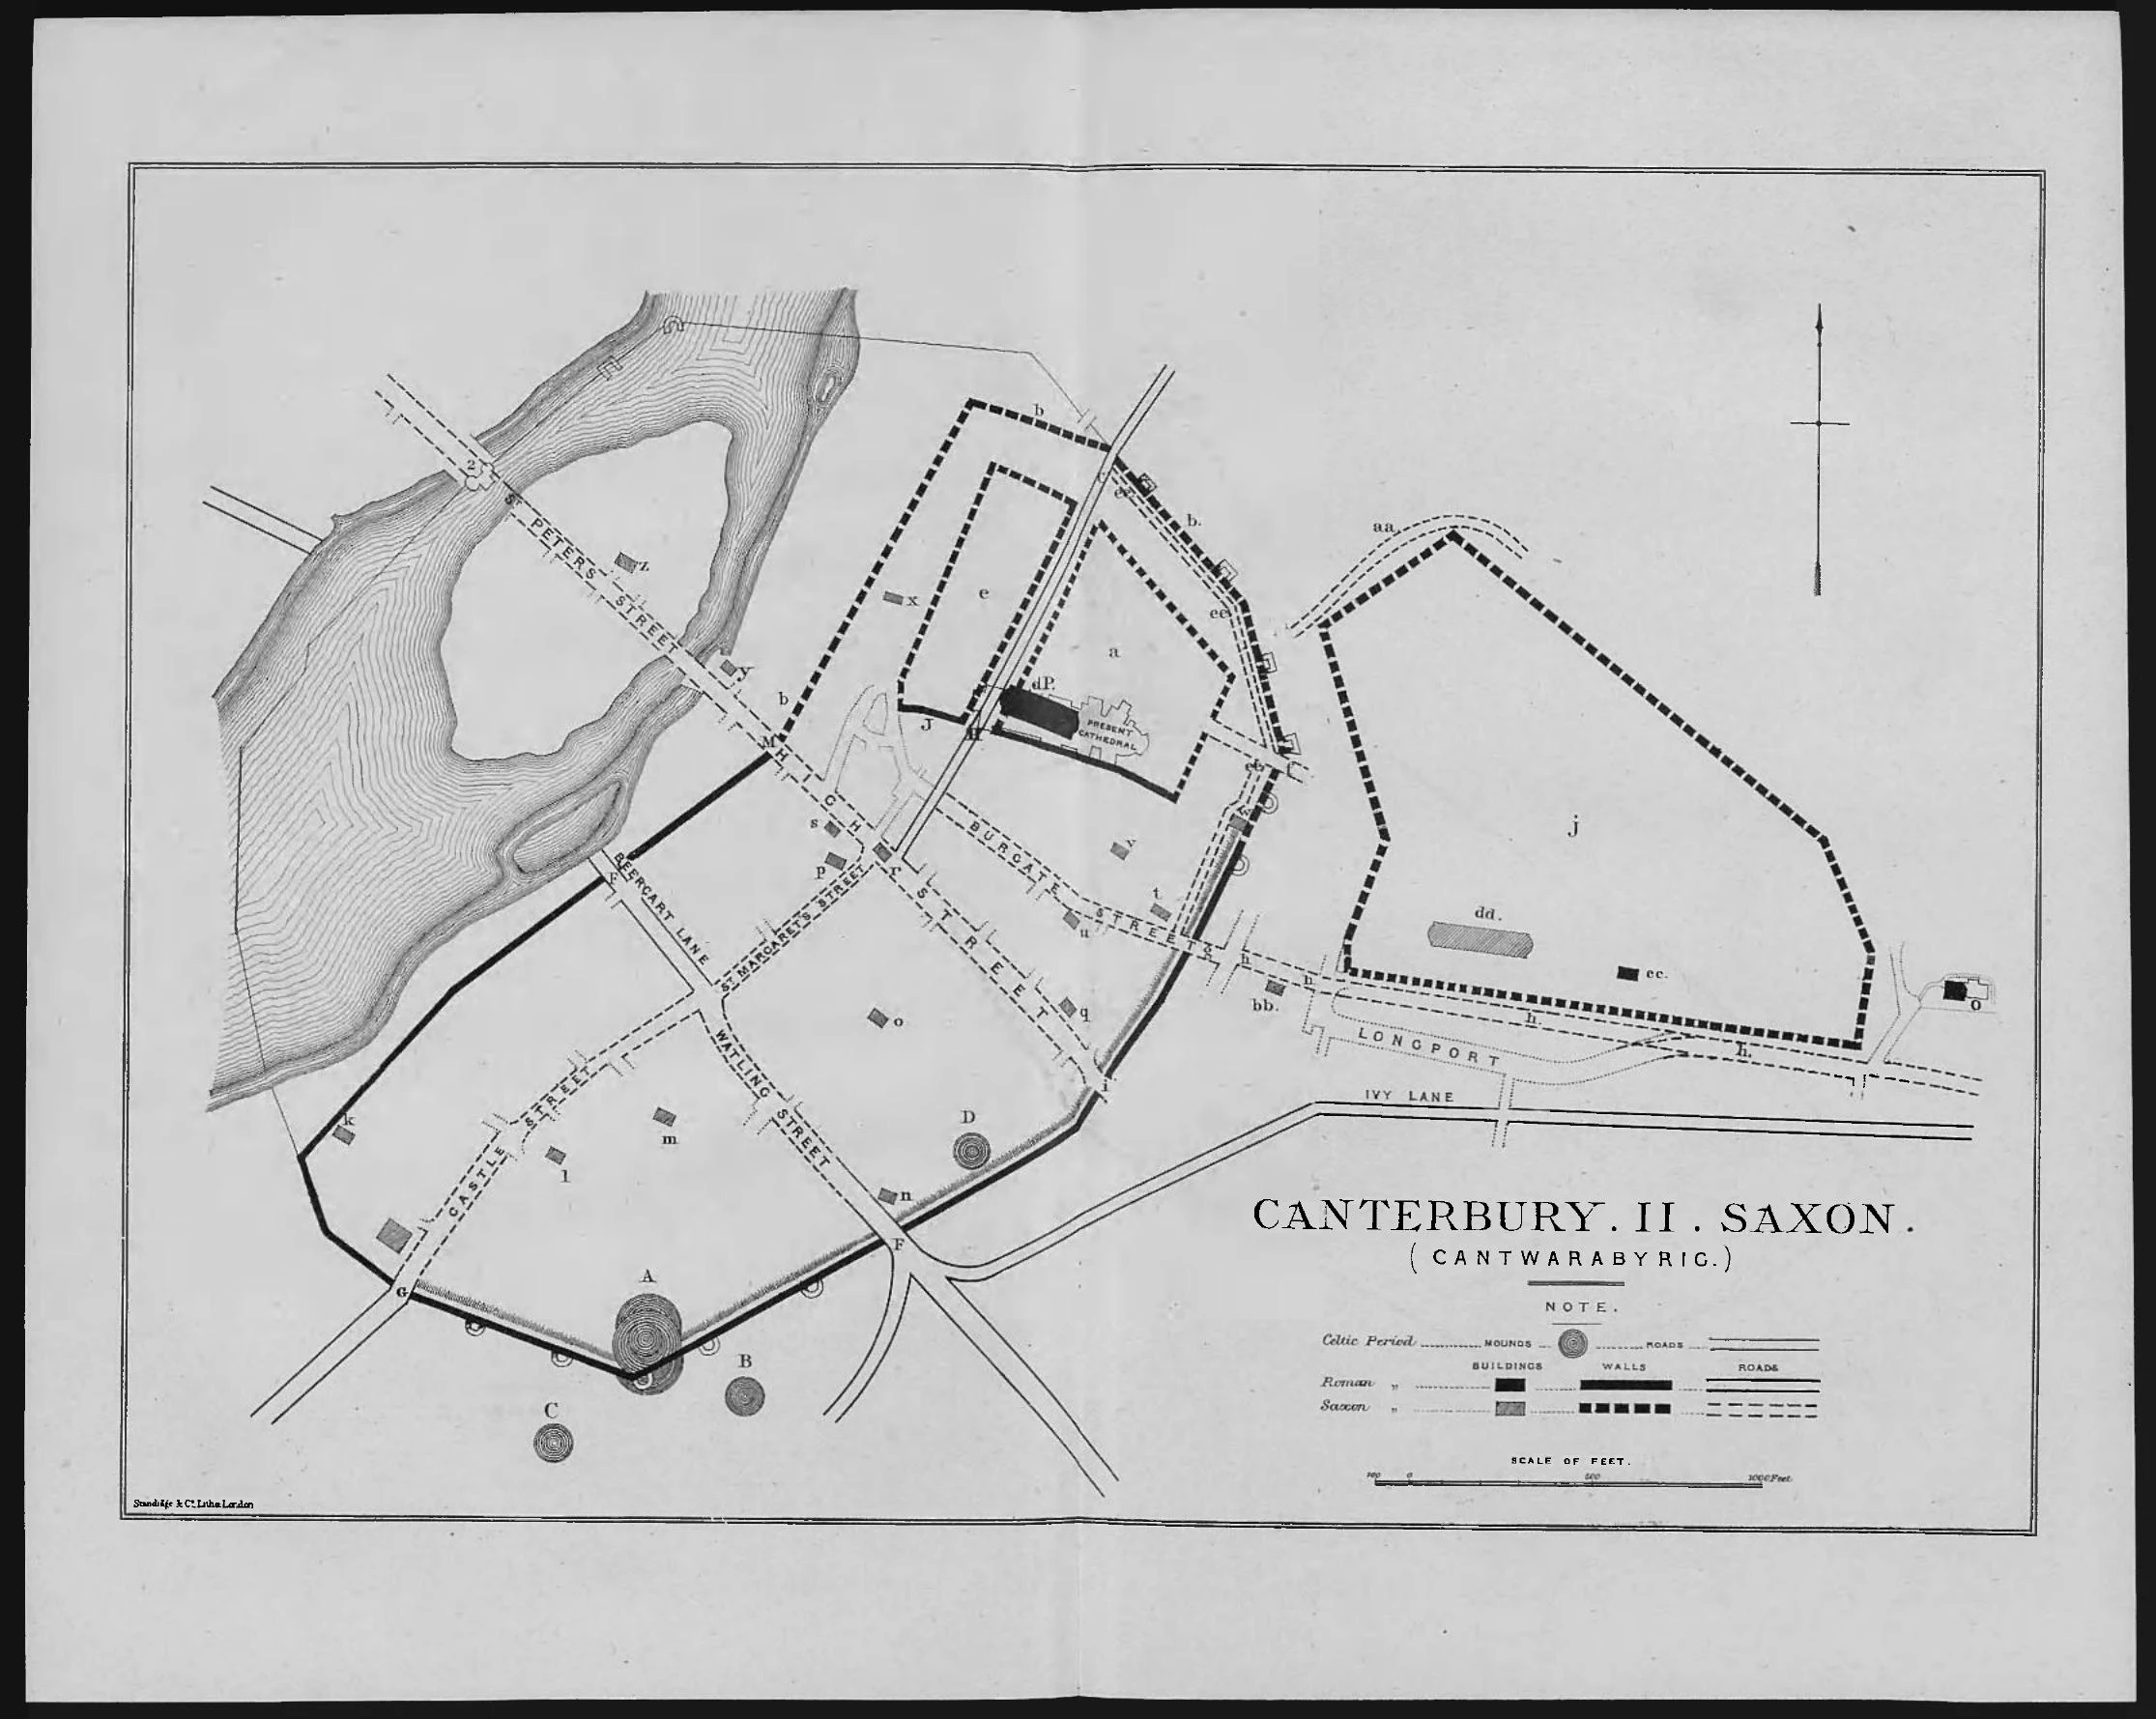
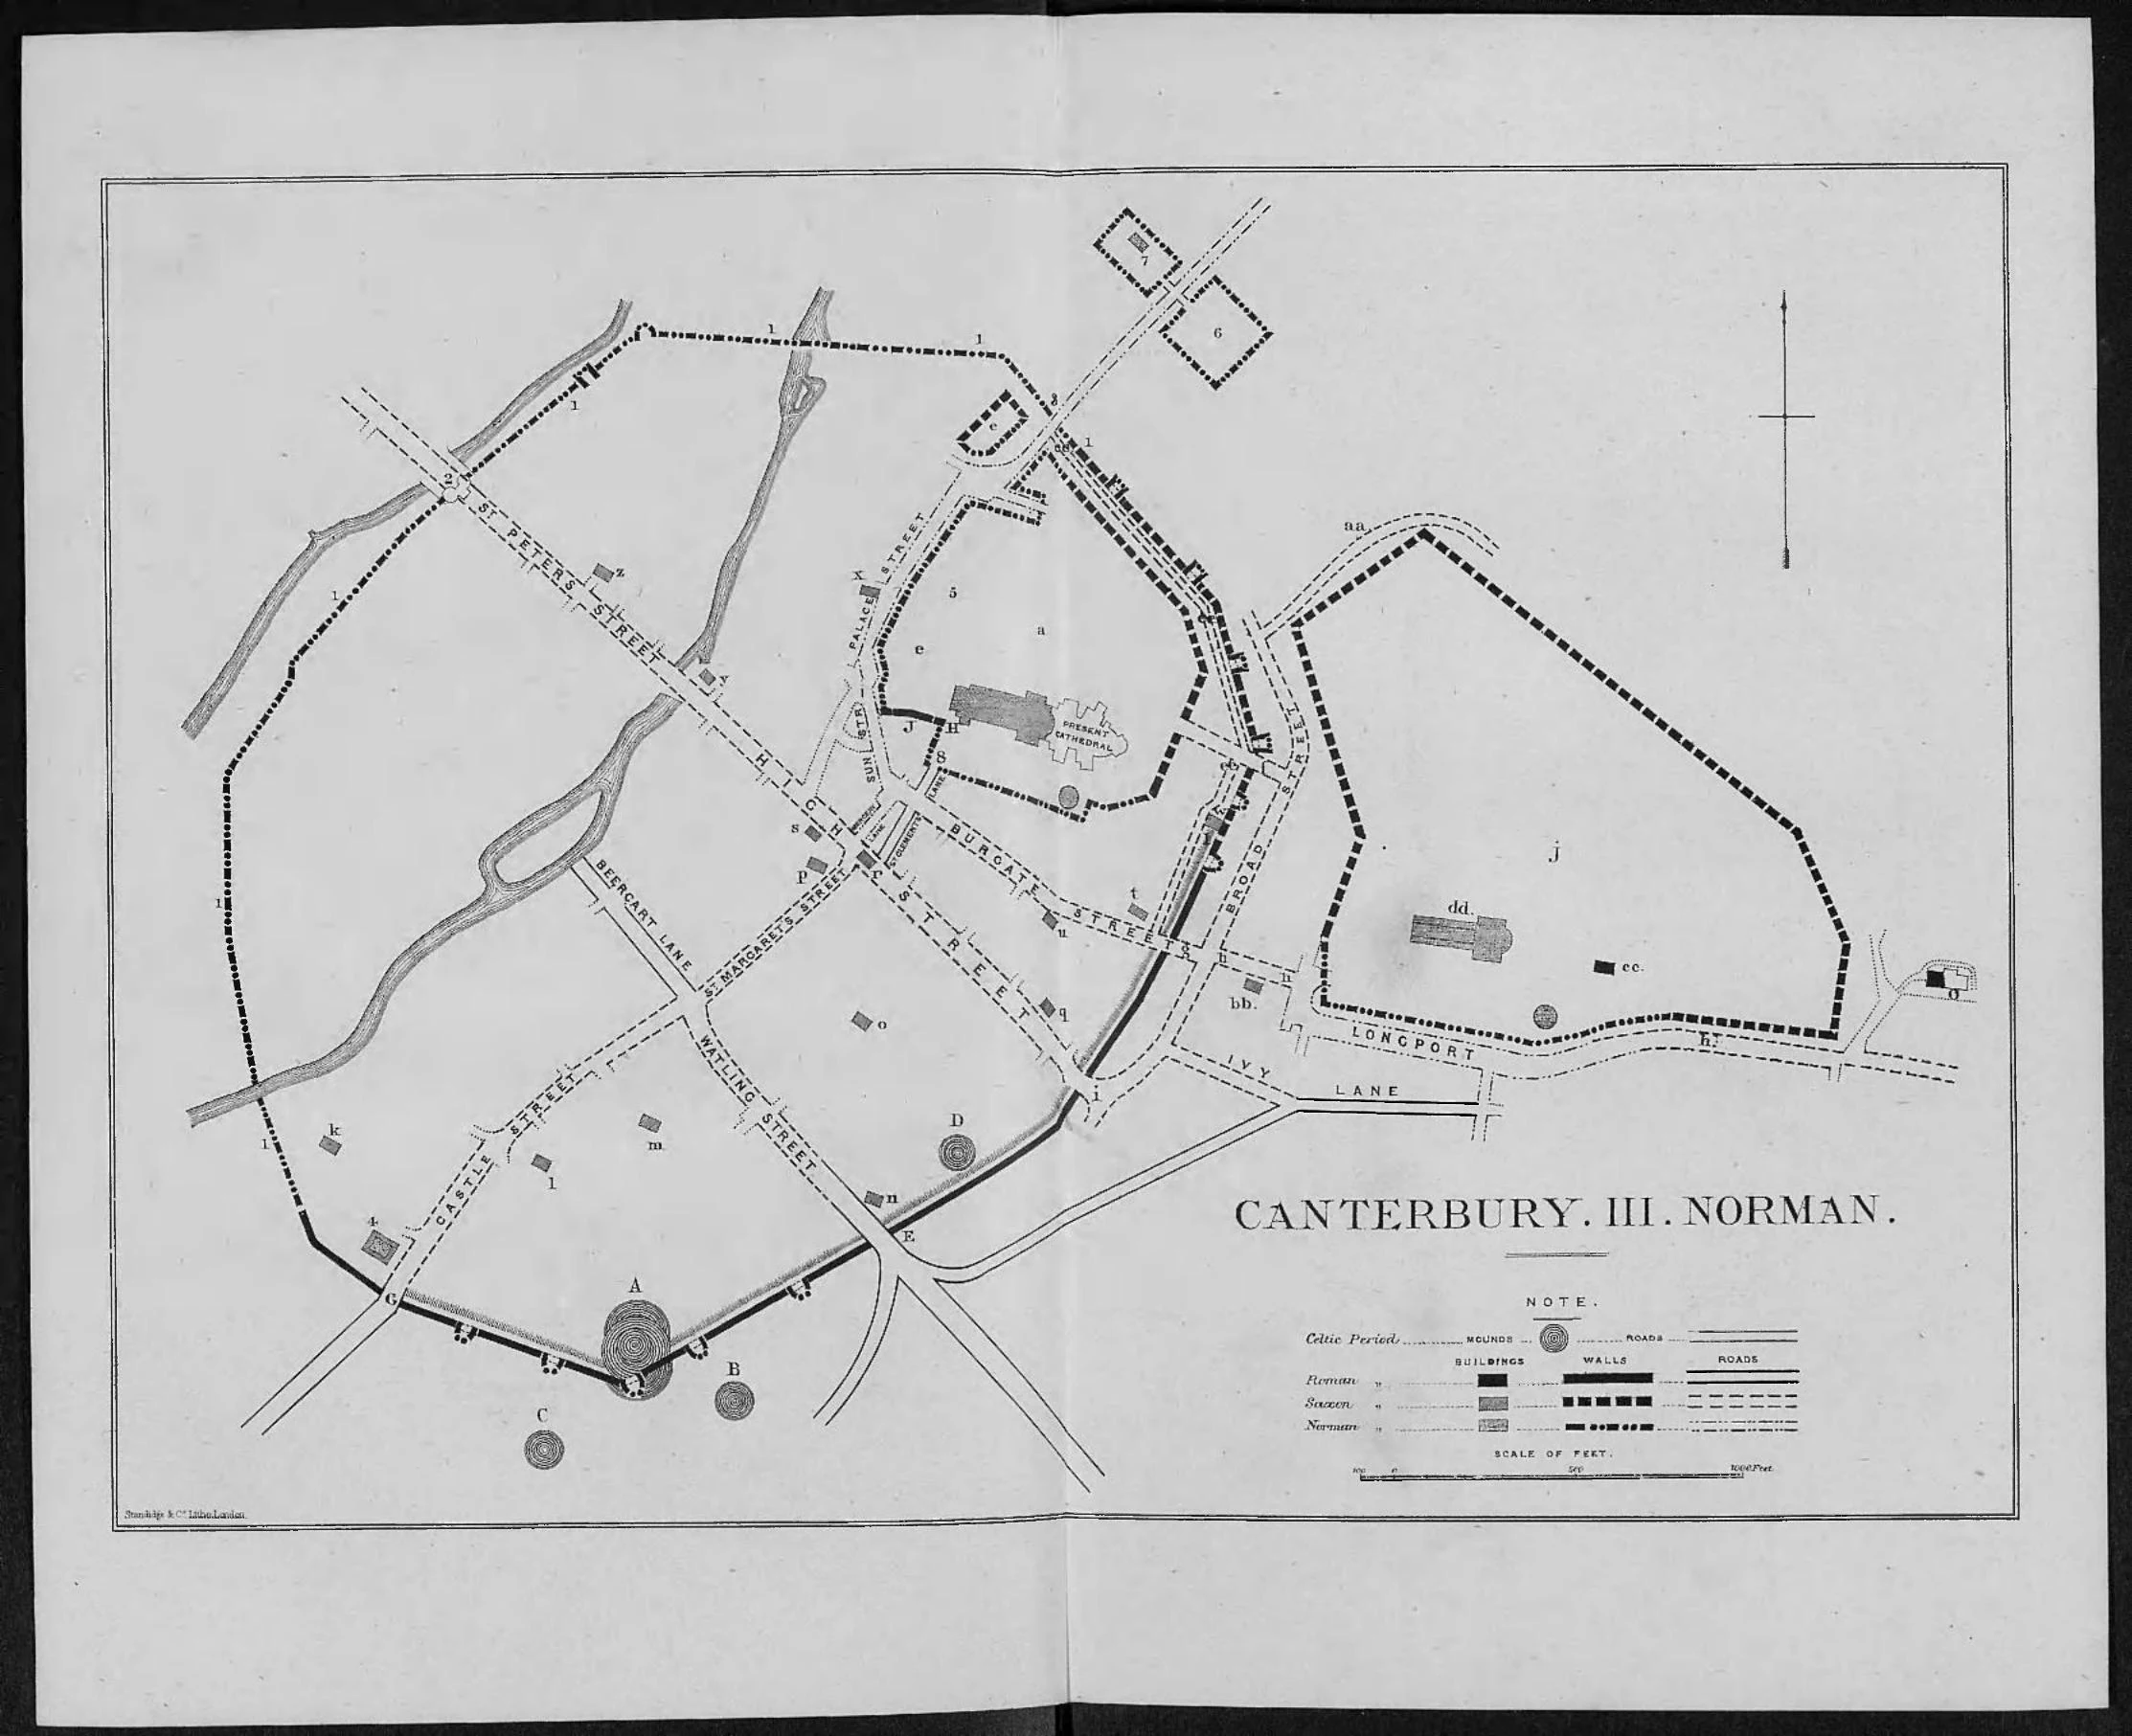
These three plans accompanied T. G. Godfrey-Faussett’s 1875 paper
Canterbury Till Domesday. Because they share an orientation and graphic
language, they can be read as a sequence: institutions, walls, roads, and
fortifications change while the mound at the Dungeon remains a fixed point.
They are nineteenth-century scholarly reconstructions, not modern archaeological
survey plans. Their value lies both in the evidence Godfrey-Faussett assembled and
in showing how Victorian antiquaries understood Canterbury’s development.
First to early fifth centuries
Canterbury I — Roman Durovernum
Godfrey-Faussett's 1875 reconstruction of the Roman city. The Dungeon mound is marked A near the south-east wall. The plan is historical evidence about nineteenth-century interpretation, not a modern archaeological survey.
Look for: The wall bends around the mound—the spatial observation at the centre of Godfrey-Faussett's argument that it predated the Roman circuit.
Open the archival record →
Fifth to eleventh centuries
Canterbury II — Cantwarabyrig
The second plan retains the Roman ground plan and adds the extended northern city, royal and ecclesiastical sites, gates, churches, and St Augustine's Abbey.
Look for: The mound remains fixed near the southern wall while Canterbury's political and ecclesiastical centre expands north and east.
Open the archival record →
1066 to the early twelfth century
Canterbury III — Norman Canterbury
The third plan adds the Norman castle, westward wall extension, Lanfranc's palace, and new institutions. The ancient mound was briefly adapted as a timber fortification before the stone castle superseded it.
Look for: Read the three plans as a sequence: the city changes around a topographical feature that persists.
Open the archival record →
A fourth plan
Charles Cotton reproduced a separate plan of Durovernum in 1929. It is useful
for comparison but does not share the dimensions of Godfrey-Faussett’s sequence,
so it is presented separately in the archive as the
Plan of Durovernum.